Sub-Total: $0.00
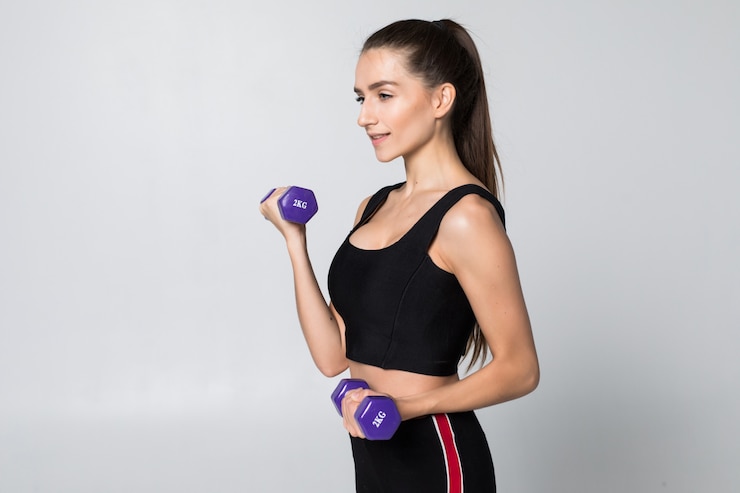
Lifting weights with hypermobility can be tricky. Doing it incorrectly may lead to flare-ups and injuries that take a long time to heal.
In this article, you’ll find three techniques you can utilize to ensure you don’t injure yourself while lifting weights.
We’ll discuss:
- The power lift.
- The golfer’s lift.
- The split’s stance.
Read on to learn more and apply them in your next workout.
General guidelines for lifting weights with hypermobility
Anytime you lift, use minimal weight, and focus on your movement first. After you are comfortable with the technique, you can gradually add more weight until you find the most weight you can do correctly.
As a rule of thumb, if you can only lift 15 pounds from the height of your knees with proper form, you will be causing yourself pain or injury if you have to move a 25-pound bag of dog food. Apply this concept to your workout and day-to-day activities.
Once you have determined your weight-lifting threshold, you can use this information to decide how to move forward.
Ask yourself if you want to work on building up your strength to be able to lift what you need to do, or have someone else help you when lifting weight.
3 techniques for lifting weights with hypermobility safely
Power lift
When lifting weights or objects in a power lift stance, position your body over the item to be lifted. Lower your body towards the object by bending your hips and knees and only using a squat motion.
Lean forward from your hips, but do not round your back. Grasp the item, set your core muscles, and lift straight up with your legs, keeping your head steady.
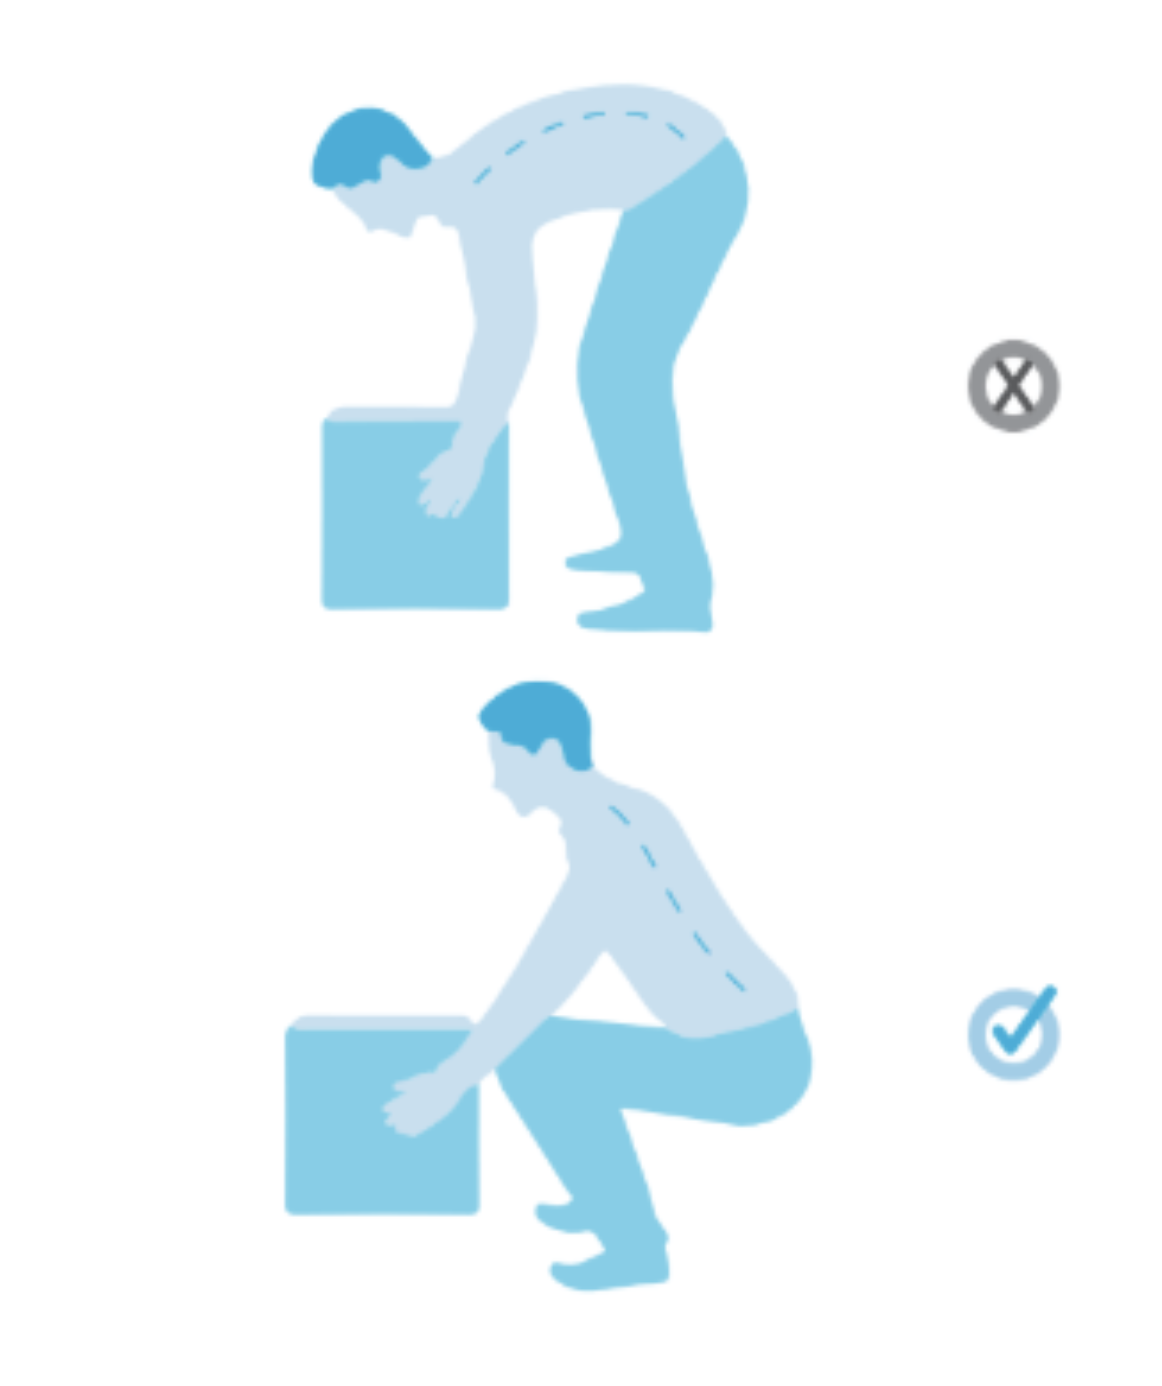
- Bend forward at your hips (stick your butt out)
- You should be able to see your toes
- Use your glutes by tightening your buttocks to return to stand
- Keep objects close to your body; it makes it easier to lift
- Move with your feet, don’t twist with your back
Golfer’s lift
This lift helps promote safety when reaching down to pick up small objects off the floor or when reaching over a barrier.
This technique is more energy-efficient than squatting every time you drop a pencil and uses minimal force on your back.
Use it only for very light objects – 5 pounds or less.
When practicing the “Golfer’s Lift,” one foot stays fixed on the ground as you lean horizontally to the object. Then, the back leg points straight back behind you to counterbalance the weight of the upper back. Ensure that your back remains straight the entire time.
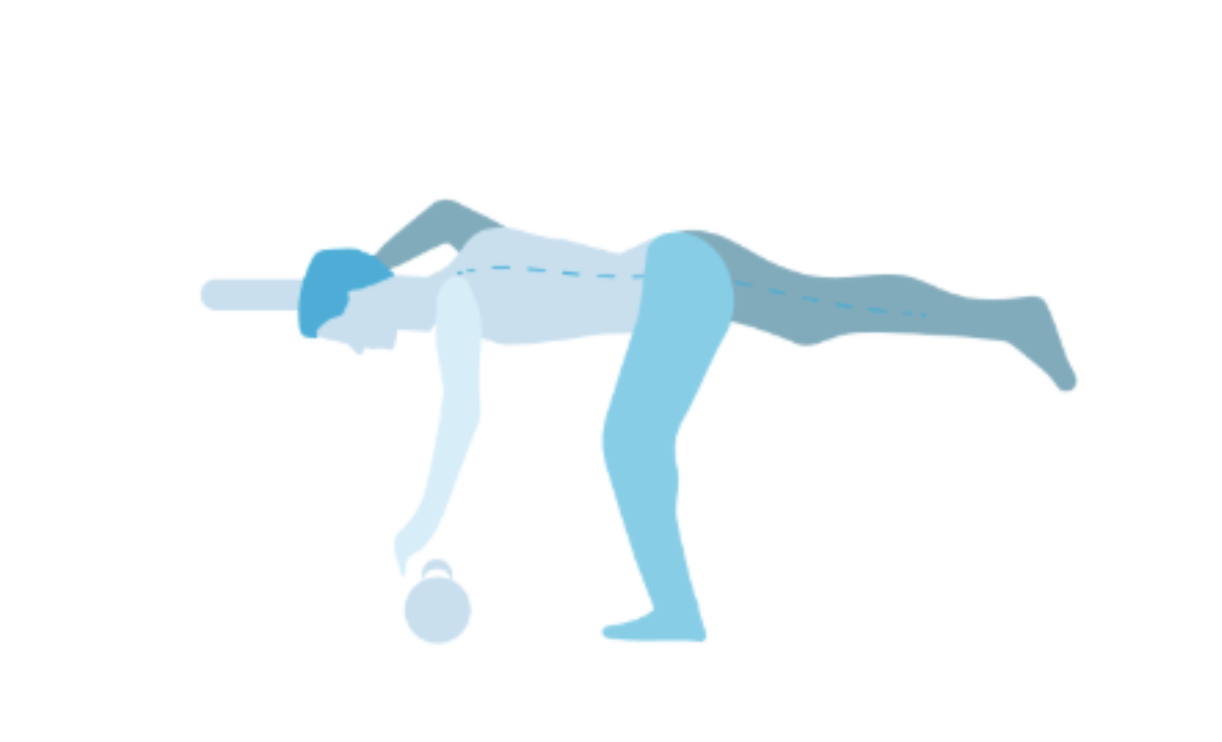
- Bend at your hip and lower if you need to by bending your knee.
- Avoid losing your balance by holding onto the edge of a table or wall.
- Move in one smooth movement forward and return in 1 motion by allowing your back leg to drop down as you return to standing.
Split stance
The “Split Stance” technique is an excellent option for lifting items out of an object that requires reaching into, such as a car trunk or a chest freezer.
Use this technique for reaching and moving shoulder height or above items. The “Split Stance” works well for putting dishes away on a higher shelf or cleaning higher surfaces. This lift makes things easier to control, much easier on your back, and provides more stability, allowing you to do or lift more.
For this lift, place one foot in front of the other in a staggered stance. Have a comfortable amount of space between your feet; they don’t need to be directly in front of one another.
Block the front knee against the edge of the item, if available, such as the bumper of a car or against a cabinet. Then bend forward at your hips, keeping your back straight.
You will lean forward toward whatever you are reaching, as opposed to potentially falling backward or to the side. Tighten your stomach muscles to stabilize your back.
Shift your weight from your back foot to the front foot as you lean forward. As you grab the object you need and return to standing, use your glutes to lift yourself back up, or to support you, not your back.
Shift your weight from the front leg to the back leg, and then return to your starting position.
- The more heavy or awkward the object, the wider the stance should be.
- Shift your weight to your forward leg to pick up the object and then back to the leg behind to pull the object toward you.
Final recommendations
- When practicing these techniques and starting lifting weights, make sure you are using the right area and starting with moving a couple of inches.
- Remember, you don’t have to do everything the first time. As this gets easier, you will naturally begin to go farther.
- If you have pain, stop. Add repetitions of your level, and don’t try to force anything.
- As soon as you force something, the weakest area of your body will give first, not necessarily the area of focus, and your larger, stronger muscles will take over.
- Remember to take things slow, don’t push yourself, and stay consistent!
If you are looking for Hypermobility resources, feel free to check out my blog.
Are you looking to manage your Hypermobility symptoms?
Check out the Hypermobility Solution, the Hypermobile Neck Solution, and Hypermobility 101.

About Kate

Kate Skinner is a Doctor in Physical Therapy, co-founder of Great Divide Physical Therapy, and creator of Hypermobility Solution.
Recent Posts
Posted in Uncategorized
